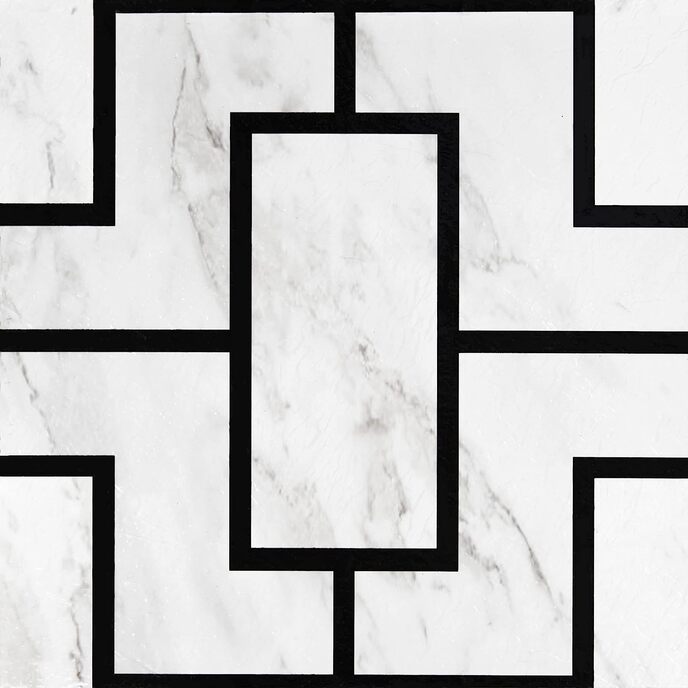
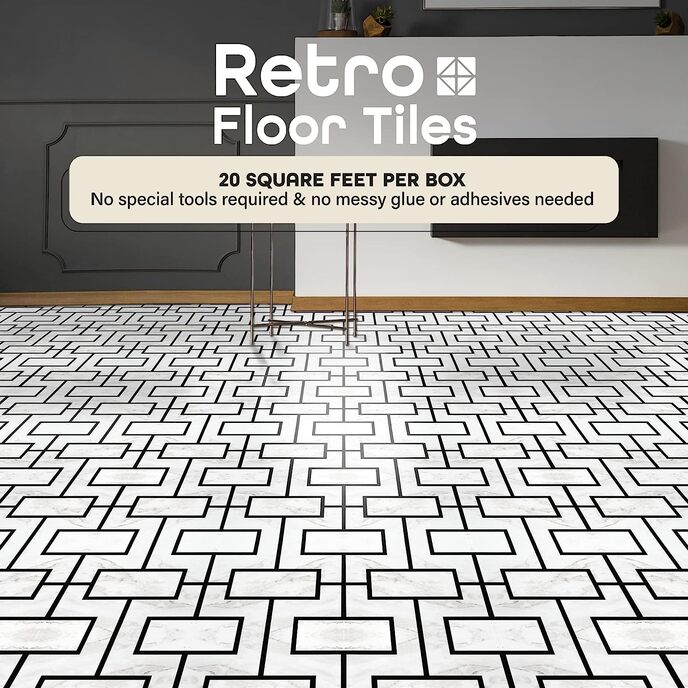
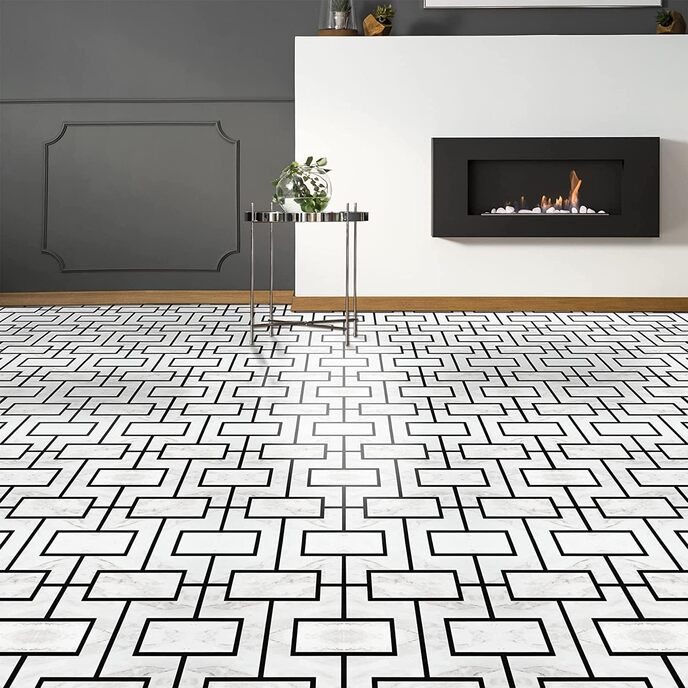
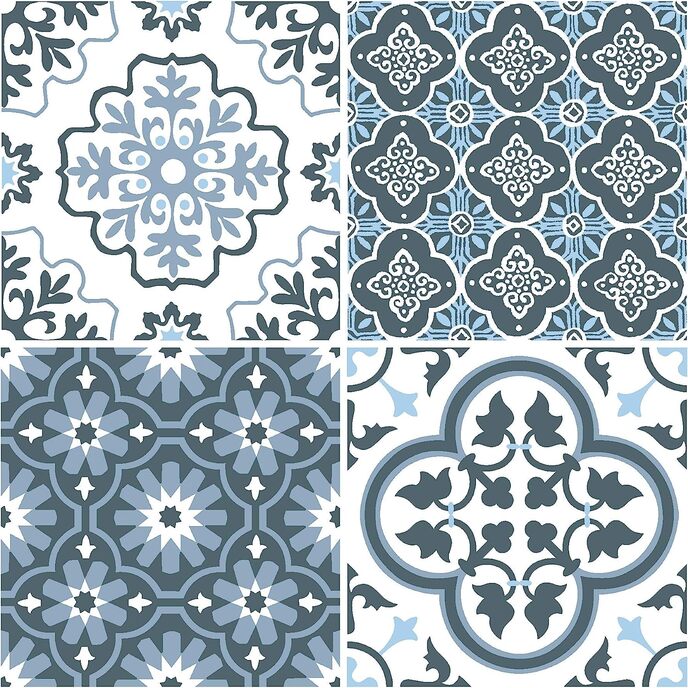
We love our beautiful, new floor as we finally completed it, but the installation process was rife with problems. First and foremost, the the black graphic pattern printed on these tiles was noticeably misaligned (up to 1/4") from tile to tile, especially between boxes but often even within the same box. There are weasel words on the box trying to convince you that this doesn't matter, but know that if you order just enough tiles for the job you will not get clean, nicely-aligned results as shown in the product photos. Despite our best efforts, our first try resulted many misaligned tiles similar to those in the lower left of my picture with this review. We wound up tearing up our first installation and starting over with new tiles-- a mess, as the adhesive residue had to be removed with GooGone, then the GooGone residue removed with full-strength SimpleGreen as a degreaser. Our solution was to order 2x to 3x the number of tiles required, and carefully test-align edges of each and every tile (in groups) before peeling off the backing. This approach would only be advisable if your spouse had firmly fallen in love with this particular tile pattern and integrated it into the larger room design, and of course if the cost of floor tiles were a minor concern in the grand scheme of your remodeling project. The results, as you can see, were mostly good. (And now we theoretically have lots of spares, in case of future damage.) Also, the reject ratio for these tiles was pretty high; 2 to 4 tiles per box of 20 had major blemishes that prevented their use, except perhaps along an edge (where the defect might be cut off) or under a cabinet or fixture where it wouldn't be seen. Order more than you need, in any case. Definitely seal the subfloor, per instructions on the tile box. We chose a latex floor sealer that turned out to have a sandy surface, which we had to laboriously power-sand down to get a smooth surface. As with most peel-and-stick tiles, once a tile is stuck down firmly you shouldn't pull it up except to throw it away; the adhesive won't come up evenly and you won't get good adhesion. Did I recommend ordering more tiles than you need, just in case? :-) Finally, once you're done, seal the seams. Any peel-and-stick tile will have some adhesive exposed on the edges, eventually collecting dirt and dust that's a challenge to remove. Plus, sealing can help with any edges that don't quite stick firmly. We used two tubes of Infuze clear vinyl seam sealer for our 50 sqft. installation. It's not really meant for peel-and-stick tile, so contrary to the directions on the tube, don't peel up the edges of your tiles; working with a few tiles at a time, just apply a bead to the seam surface; let it settle in for a minute or three; squeegee up the excess with one of those blue, flexible caulking tools; then carefully use denatured alcohol on an old T-shirt or paint rag to clean up the last bits from the tile surface without letting the alcohol seep into the seams. This sealer dries like soft, clear silicone, so any residue remaining on the tile surface after it dries can be easily rubbed/crumbled off with fingers or a gentle, plastic scouring pad. (We used Golden Fleece.) Just be careful not to gouge it out of the seams that you were trying to seal. Other products mentioned in this review, available on Amazon: Infuze Universal Vinyl Seam Sealer GRIVER 5-Piece Caulking Tool Kit,Caulk Finishing Tool Kit (5-Piece Caulking Tool Kit) Golden Fleece (Chore Boy) Scrubbing Cloths Denatured Alcohol